How to Scrape Instagram Hashtags and Geolocate Them on a Map

Every day, 1.3 billion images are shared on Instagram. Many of these posts include hashtags, which are used to increase exposure on Instagram. It’s customary for companies to scrape hashtags and geolocate them to analyze and understand their target audience and preferences. They can then use the information to create relevant content while considering the costs and benefits of their marketing strategies.

Businesses from various industries use the data collected from hashtag scraping and geolocation to make informed decisions about audience segmentation, content creation, and marketing strategies.

In this guide, we’ll walk through the step-by-step process of scraping Instagram hashtags and geolocating them on the map using The Social Proxy’s scraper and Geolocate Lookup APIs. You’ll learn how to set up your environment, scrape Instagram hashtag data, geolocate images, and visualize the results on a map.

The Social Proxy Scraper and Geolocate API

The Social Proxy is a leader in the data collection industry, offering secure and efficient data scraping and geolocation. With its developer-friendly APIs, you can extract valuable insights from Instagram while complying with data protection regulations. In this guide, we’ll use two of its powerful tools: the Scraper API and the geolocate lookup API.

The Scraper API is a cutting-edge tool that enables developers, businesses, and analysts to mine rich data from Instagram. It mimics user behavior by sending requests to Instagram to retrieve posts based on specified hashtags. Complying with ethical guidelines, the API offers a high success rate, speed, and scalability to handle large amounts of data. Businesses use it to monitor trends, identify target audiences, and analyze competitor strategies.

The Geolocate Lookup API complements the Scraper API by adding a geographical context to the extracted data. It analyzes the metadata and content of Instagram images to estimate the location where the photo was taken or posted. This API is fast, efficient, and compatible with Google Maps for location determination. E-commerce companies use it to optimize location-based marketing by understanding local consumer trends.

How to scrape Instagram hashtags and geolocate them on a map

Step 1: Set up your environment

  • For this tutorial, we’ll use Python. We’ll also use HTML to plot coordinates.
  • Download a code editor of your choice (e.g. Visual Studio Code, PyCharm)
  • Download and install Python on your system and set it up in your chosen code editor.
  • You’ll also need access to the Scraper API and Geolocate Lookup API.

Follow this guide to ensure the necessary tools and APIs are ready.

  • Visit The Social Proxy’s official website.
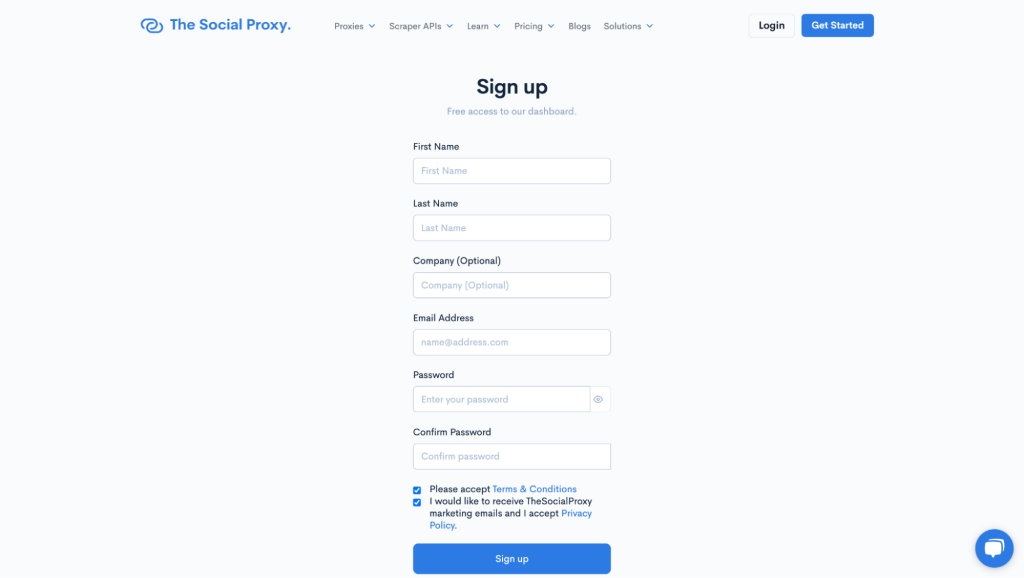
  • Click “Login” if you already have an account. To create a new account, click “Get Started” and follow the next steps.
  • Fill out the required fields in the signup form and click “Sign Up.”
  • The Social Proxy will send you an email with an account verification link.
  • Click on it to verify your account.
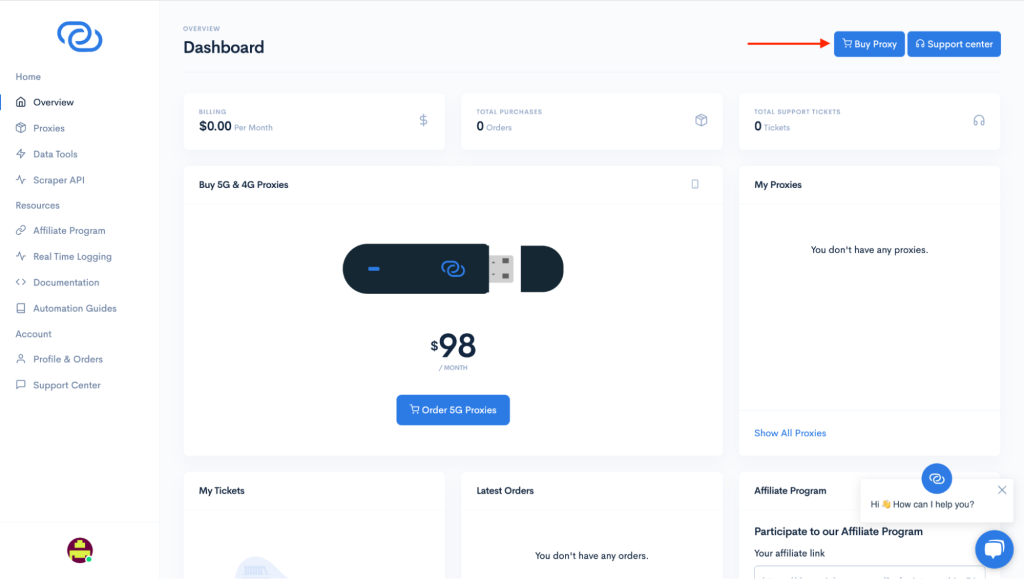
  • Visit your dashboard.
  • Select “Buy Proxy,” and choose a plan.

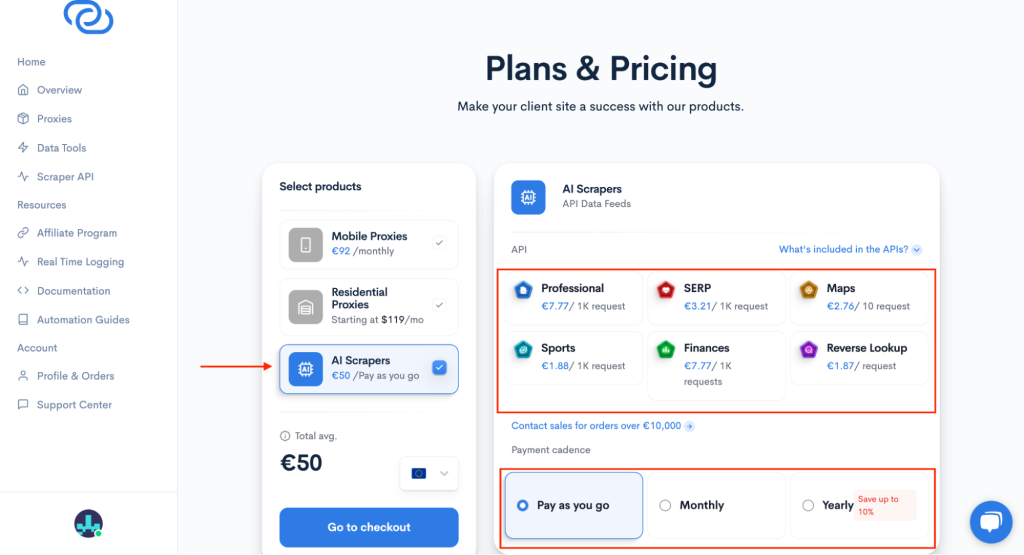
On the buy proxies page, select “AI Scrapers,” choose your subscription type, and click “Go to checkout” to complete your purchase.

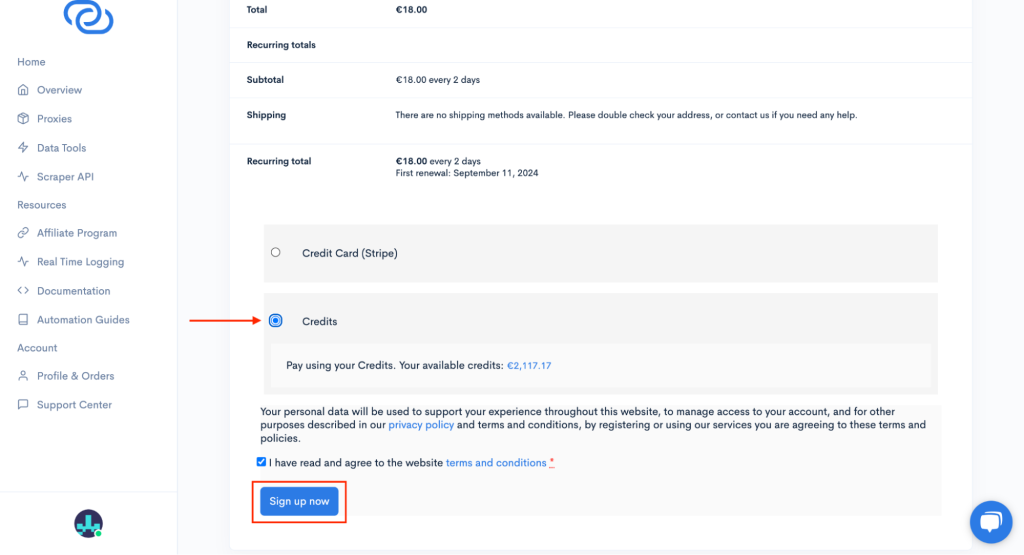
Make a payment on the payment page, and click “Sign up now.” Now you can start using the Scraper API.

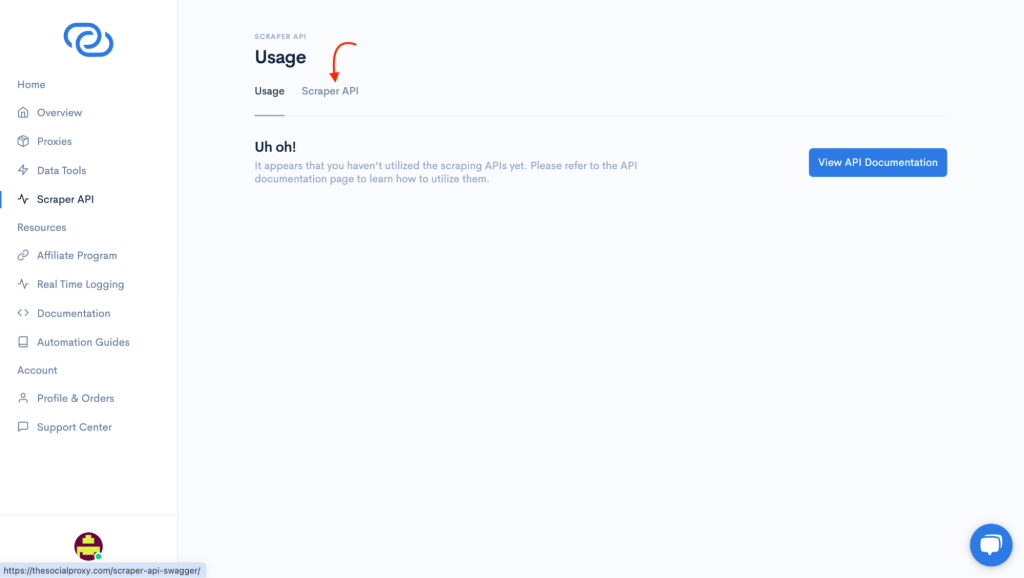
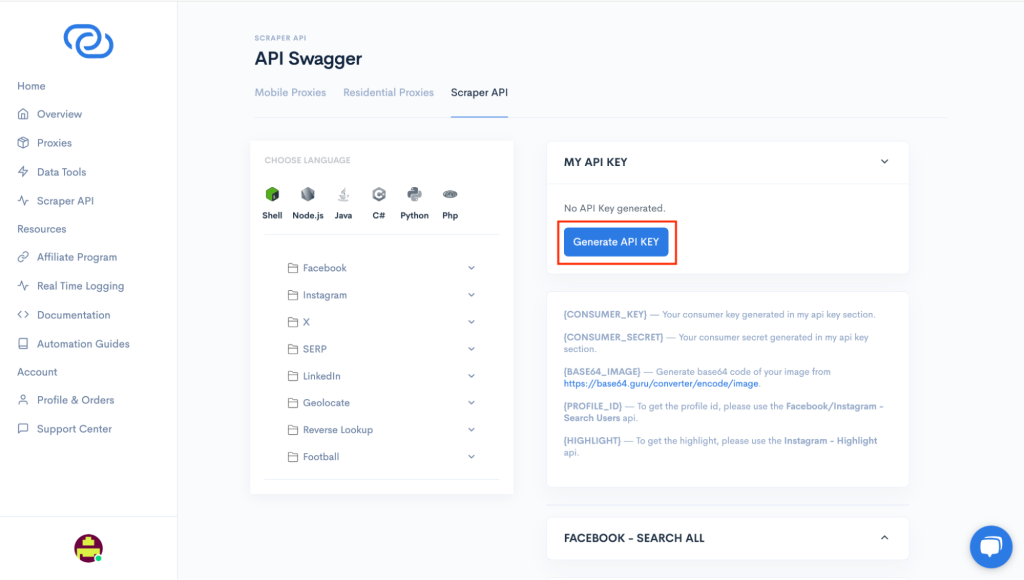
In order to use the Scraper API, you’ll need to generate your API keys. Select “Scraper API” in the side menu and click on the “Scraper API” tab.

Click on “Generate API KEY.”

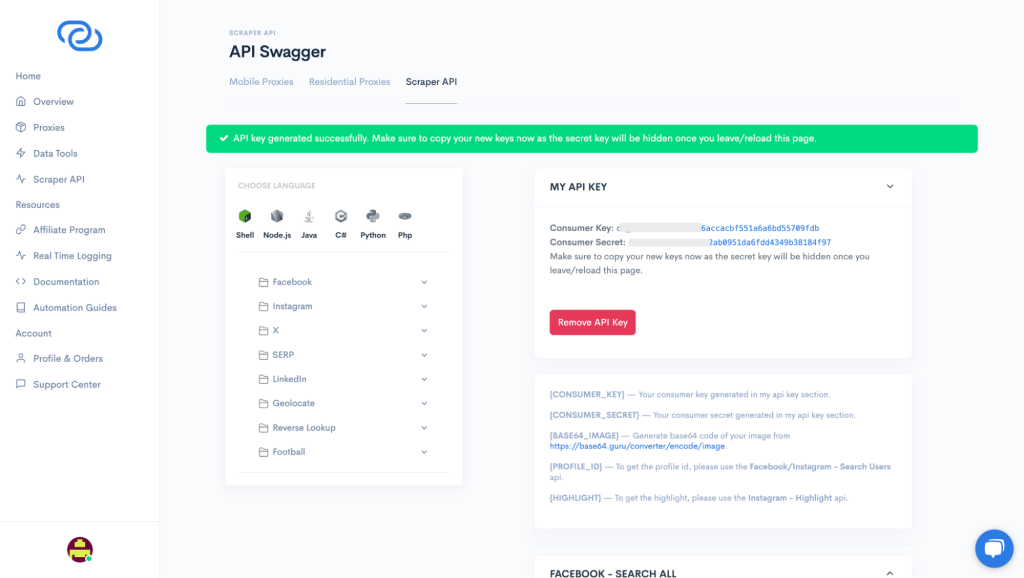
Note: You can use the keys to scrape Instagram hashtags and to geolocate the scraped images.

Make sure you copy your Consumer Key and Consumer Secret immediately before they are hidden. Keep these keys secure, as we’ll use them in our script.

Step 2: Scrape Instagram hashtag data

Before we start scraping, we have to select which hashtag to scrape. Here are some things to consider:

  • Relevance: You have to ensure the hashtag aligns with your target audience and their preferences (e.g. “#bestpizza,” “#bucketlist,” etc.).
  • Influencer usage: Check if influencers in your industry are using the hashtag.
  • Simplicity: Ensure whatever hashtag you choose is short, simple, clear, and specific.
  • Competition: Check if the competition for the hashtag you’re considering is high or low. If it is high (e.g. “#pizza,” “#bucket,” “list,” etc.), you might want to consider using alternative relevant hashtags with lower competition.
  • Location-based: Since you intend to geo-locate the hashtags you want to scrape, you have to use location-based hashtags to filter results (e.g. “#nycbestpizza” or “#foodbucketlist”).

In this example, we’ll use the hashtag “#bestpizza.” Feel free to replace it with a hashtag relevant to your project. In order to use The Social Proxy Scraper API to get the hashtag info on Instagram, you’ll need to write a script to make a GET call to the following endpoint:

API endpoint:

				
					GET /wp-json/tsp/instagram/v1/tags/info


In your code editor, implement the following code to use the Scraper API to fetch data for the tagName:

				
					import requests
import json

url = "https://thesocialproxy.com/wp-json/tsp/instagram/v1/tags/info?consumer_key=[CONSUMER_KEY]&consumer_secret=[CONSUMER_SECRET]&tagName=bestpizza"

payload = {}
headers = {
  'Content-Type': 'application/json',
}

response = requests.request("GET", url, headers=headers, data=payload)

print(response.json())


Note: In the code examples, you’ll need to replace {CONSUMER_KEY} and {CONSUMER_SECRET} with your actual keys from The Social Proxy Scraper API.

Here is a breakdown of what the code does:

  1. It imports the requests and json libraries for making HTTP requests and handling JSON data, respectively.
  2. It builds the API URL using The Social Proxy endpoint for fetching Instagram tag information, including placeholders for the consumer key and secret, and the target hashtag.
  3. It sets up headers for the HTTP request, indicating that the expected response content type is JSON.
  4. It sends a GET request to the constructed URL using the requests library.
  5. It prints the raw text response from the API, which likely contains information about the specified Instagram hashtag in JSON format.

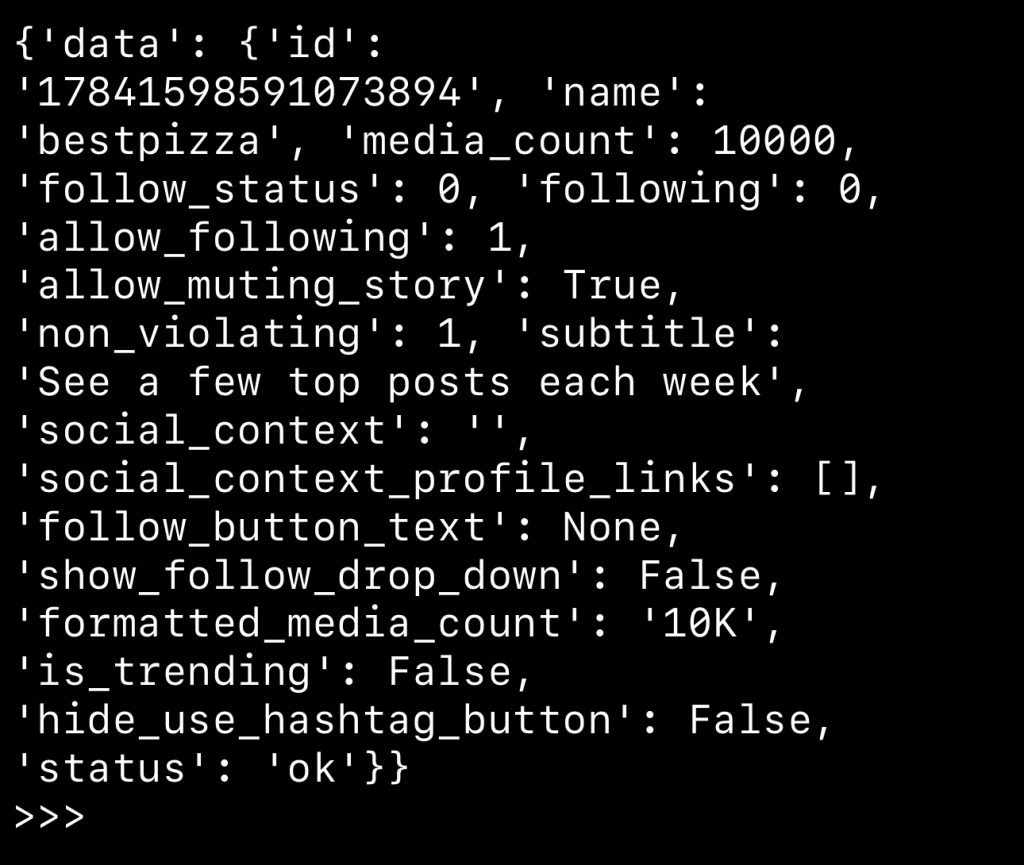
Here is the output:

Based on the results, the Instagram hashtag “bestpizza” has 10,000 media posts and does not follow or have any followers.

Step 3: Geolocate the scraped images

Geolocation of scraped images is basically about determining the geographical location of an image. In this case, we want to determine where an Instagram image of the hashtag “bestpizza” was captured or uploaded.

There are two ways to geolocate scraped images using The Social Proxy.

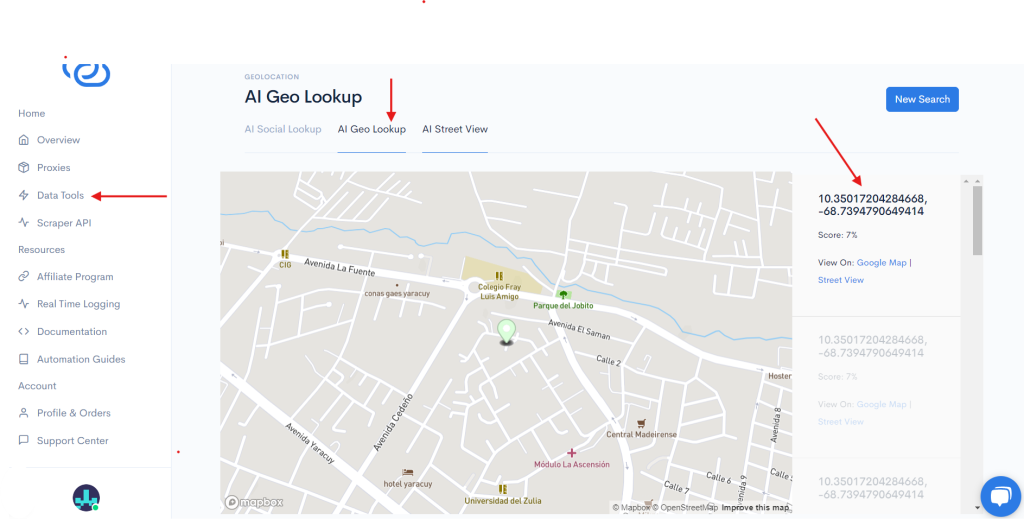
  • AI Geo Lookup: This is an AI tool that helps determine the geographical location of an image. You can find it in the “Data Tools” section of the main menu on your dashboard on The Social Proxy. It allows you to upload the image you want to geolocate, then it automatically analyzes the image and comes up with results. The results contain geographical coordinates, which you can view on Google Maps or Google Street View.
  • The Geolocate Lookup API: This is an API tool that works by converting image data (like EXIF data) into geographical coordinates. Because of the coding process involved in using this API, it is more complex than it might initially seem.

Now that we have our Instagram hashtag data, let’s use The Social Proxy’s Geolocate Lookup API to identify the geographical coordinates of images associated with this scraped hashtag.

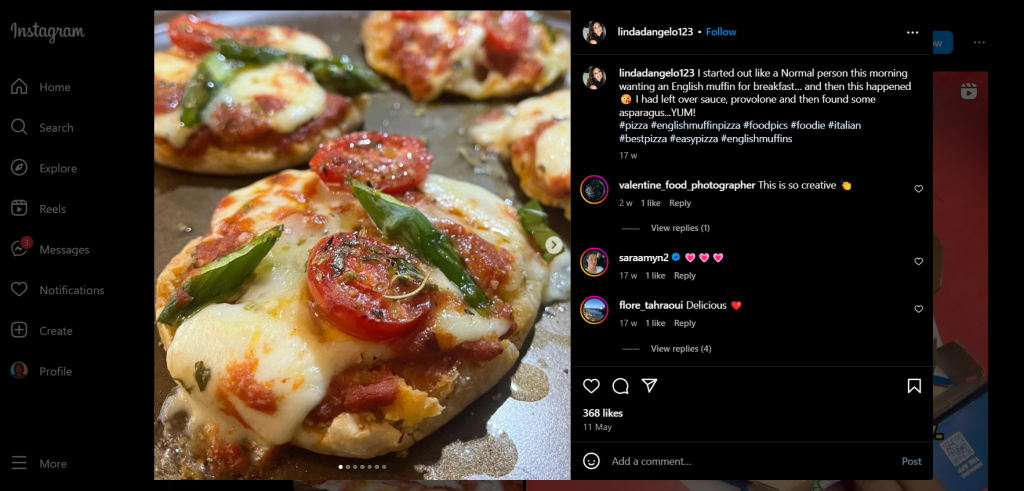
The same API keys used in scraping will also be used in geolocating the scraped images. Here is an image we have chosen from the sample hashtag “bestpizza” which we scraped:

To use The Social Proxy Geolocate Lookup API to determine where the above Instagram image was captured or posted, you’ll write a script to make a POST call to the following endpoint.

API endpoint:

				
					POST /wp-json/tsp/geolocate/v1/image


In your code editor, implement the following code to use the Geolocate Lookup API to fetch data for the image:

				
					import requests
import json

url = "https://thesocialproxy.com/wp-json/tsp/geolocate/v1/image?consumer_key=[CONSUMER_KEY]&consumer_secret=[CONSUMER_SECRET]"

payload = json.dumps({
  "image": "{BASE64_IMAGE}"
})
headers = {
  'Content-Type': 'application/json',
}

response = requests.request("POST", url, headers=headers, data=payload)

print(response.text)


Note: In the code examples, you’ll need to replace {CONSUMER_KEY} and {CONSUMER_SECRET} with your actual keys from The Social Proxy Scraper API. Also, you’ll need to replace {BASE64_IMAGE} with the Base64 encoded version of your chosen image.

Here is a breakdown of what the code does:

  1. It imports the requests and json libraries for making HTTP requests and handling JSON data.
  2. It sets the URL of the API endpoint that will be used to geolocate images.
  3. It creates a JSON payload containing the base64 encoded image data to be sent to the API.
  4. It sends a POST request to the API endpoint with the prepared payload.
  5. It prints the text content of the response received from the API, which likely contains the geolocation information extracted from the image.

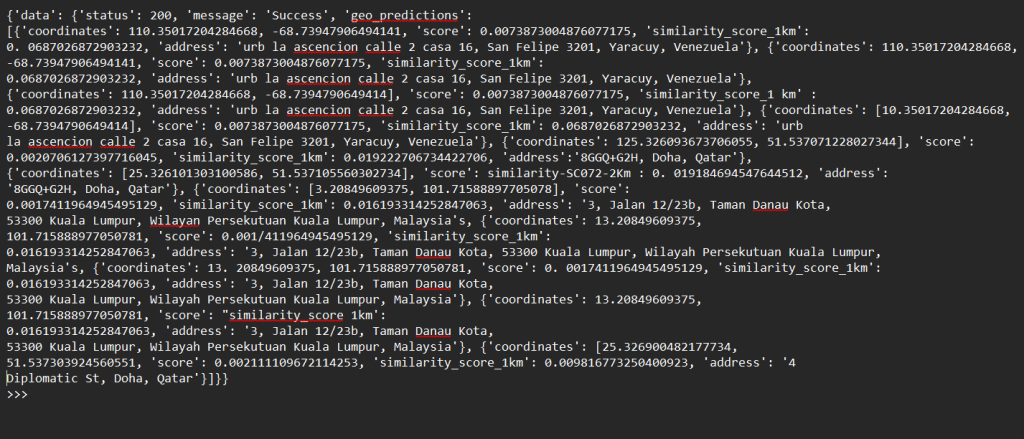
Here is the output:

Based on the results, this Instagram image for the hashtag “bestpizza” was captured in Doha, Qatar. While there are other potential locations on the result, the highest probability location is at 8GGQ+G2H, Doha, Qatar, with a similarity score of 0.019222706734422706.

Sometimes scraped images won’t have geolocation data. In those types of cases, you can choose to discard the image. You can also choose to estimate the location based on user profiles or user data, tagged locations, or even the user’s last known geolocation.

Step 4: Visualize the geolocated data on a map

There are different tools for visualizing the geolocated data on the map. Most developers use these two:

  • Google Maps API: Google’s mapping service offers really good visualizing features that can allow you to add markers, layers, and interactivity.
  • Leaflet.js: This is an open-source JavaScript library for interactive maps. Leaflet is lightweight, developer-friendly, and integrates well with various datasets.

For this step, we will use Google Maps API. But you can do something similar using Leaflet.

Plotting coordinates
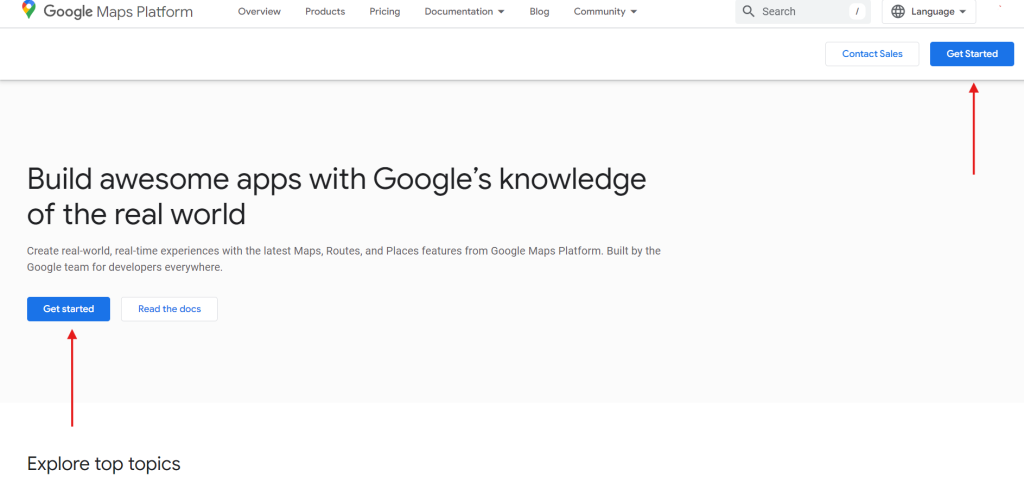
To plot coordinates using the Google Maps platform, you’ll need to set it up. If you have an account, sign in. If you don’t have an account, click “Get started.”

You’ll be redirected to Google Cloud console to create an account. Next, you get your API key. You’ll need it in the code for plotting the coordinates.

Set up a basic HTML structure to load the map. Then implement the following code:

				
					<!DOCTYPE html>
<html>
<head>
  <title>Instagram Hashtag Geolocation</title>
  <script src="https://maps.googleapis.com/maps/api/js?key=YOUR_API_KEY"></script>
  <script>
    function initMap() {
      var mapOptions = {
        zoom: 4,
        center: {lat: 40.7128, lng: -74.0060}  // Default center (New York City)
      };
      var map = new google.maps.Map(document.getElementById('map'), mapOptions);

      // Example geolocation data
      var locations = [
        {lat: 40.7128, lng: -74.0060},  // NYC
        {lat: 34.0522, lng: -118.2437}   // LA
      ];

      // Plot the locations on the map
      locations.forEach(function(location) {
        new google.maps.Marker({
          position: location,
          map: map
        });
      });
    }
  </script>
</head>
<body onload="initMap()">
  <div id="map" style="height: 500px; width: 100%;"></div>
<script>class RocketElementorAnimation{constructor(){this.deviceMode=document.createElement("span"),this.deviceMode.id="elementor-device-mode-wpr",this.deviceMode.setAttribute("class","elementor-screen-only"),document.body.appendChild(this.deviceMode)}_detectAnimations(){let t=getComputedStyle(this.deviceMode,":after").content.replace(/"/g,"");this.animationSettingKeys=this._listAnimationSettingsKeys(t),document.querySelectorAll(".elementor-invisible[data-settings]").forEach(t=>{const e=t.getBoundingClientRect();if(e.bottom>=0&&e.top<=window.innerHeight)try{this._animateElement(t)}catch(t){}})}_animateElement(t){const e=JSON.parse(t.dataset.settings),i=e._animation_delay||e.animation_delay||0,n=e[this.animationSettingKeys.find(t=>e[t])];if("none"===n)return void t.classList.remove("elementor-invisible");t.classList.remove(n),this.currentAnimation&&t.classList.remove(this.currentAnimation),this.currentAnimation=n;let s=setTimeout(()=>{t.classList.remove("elementor-invisible"),t.classList.add("animated",n),this._removeAnimationSettings(t,e)},i);window.addEventListener("rocket-startLoading",function(){clearTimeout(s)})}_listAnimationSettingsKeys(t="mobile"){const e=[""];switch(t){case"mobile":e.unshift("_mobile");case"tablet":e.unshift("_tablet");case"desktop":e.unshift("_desktop")}const i=[];return["animation","_animation"].forEach(t=>{e.forEach(e=>{i.push(t+e)})}),i}_removeAnimationSettings(t,e){this._listAnimationSettingsKeys().forEach(t=>delete e[t]),t.dataset.settings=JSON.stringify(e)}static run(){const t=new RocketElementorAnimation;requestAnimationFrame(t._detectAnimations.bind(t))}}document.addEventListener("DOMContentLoaded",RocketElementorAnimation.run);</script>
</body>
</html>


Note: In the code examples, you’ll need to replace YOUR_API_KEY with your actual Google Maps API key. You’ll also need to replace the lat and lng figures and cities with your actual figures and cities.

You can enhance the usability of your map by adding interactive elements, layers, and markers. You can:
Replace the default markers with custom icons to make it more visually appealing.
Add information windows that show details when users click on a marker.
Adjust the zoom level or size as needed.

Conclusion

In this blog, we reviewed how to effectively set up your coding and scraping environment, use the Scraper API for scraping your chosen hashtag, geolocate the scraped images using the Geolocate Lookup API, and visualize the location on a map using Google Maps API or any other mapping tool of your choice. By using The Social Proxy’s Scraper and Geolocate APIs, you can fetch valuable geographic Instagram data that can help you make informed marketing decisions, conduct, trend analysis, and more. Start leveraging Instagram hashtag data for your projects. Sign up for The Social Proxy Scraper API today and get free access to the dashboard.

Accessibility tools

Powered by - Wemake