Unlimited IP Pool
Cost Effective IP Pool
Unlimited IP Pool
Cost Effective IP Pool
Data Sourcing for LLMs & ML
Accelerate ventures securely
Proxy selection for complex cases
Some other kind of copy
Protect your brand on the web
Reduce ad fraud risks
Data from social networks like Instagram is a gold mine for understanding user behavior and preferences. Every post, whether an image, text, comment, or reaction, can reveal valuable insights about a user’s location, hashtag, or trend. These insights can enhance business decision-making, improve networking opportunities, and even help monitor a user’s real-life activities.
Imagine you need to gather intelligence before a meeting with a thought leader, business owner, or potential partner. You’ll likely spend a decent amount of time combing through their social media profiles to learn about their interests, frequently visited places, and recent activities. Fortunately, there’s technology that makes it easy to track an Instagram user’s geolocation data.
In this tutorial, we’ll learn how to build an Instagram profile tracker. We’ll start by scraping Instagram profile data, then move on to extracting location information, and finish with mapping the movements of an Instagram user. If you have basic Python knowledge and access to The Social Proxy Scraper API, you should have no trouble following along.
An Instagram profile location tracker is a tool that collects and analyzes the locations associated with an Instagram user’s posts and provides a visual of a user’s whereabouts based on their shared content. Instagram determines a users’ primary location through their device’s IP address and activity on Instagram, regardless of whether or not location services are enabled.
The Instagram profile location tracker follows users’ movements based on the geotags and metadata attached to their public posts (e.g. images, videos, and captions). Instagram users can add or edit locations when making a post, but even when they don’t, location clues can often be found in hashtags, captions, or text linked to an image. The location tracker scrapes posts from public profiles, extracting geolocation data and timestamps to determine where and when a post was made. The data then gets plotted on a map to create a visual representation of the user’s movements.
Understanding where a user has been can be crucial for market research, influencer analysis, and competitive intelligence. Brands can use this data to identify trends, target local campaigns, or analyze influencer behavior. There are several benefits to of tracking an Instagram user:
The Social Proxy offers three main solutions: mobile proxy, residential proxy, and an API scraper. With the fastest mobile proxies on the market, it’s a leading provider in the industry. Key features of its proxies (both mobile and residential) include automatic IP rotation, access to region-restricted content, fast internet speeds, seamless integration for developers, and much more.
The Scraper API from The Social Proxy allows you to ethically scrape data from social media, web pages, maps, and more without getting blocked. Unlike the mobile and residential proxies, which focus on anonymity, the Scraper AI is designed specifically for data scraping.
The Scraper API also includes the Geolocate Lookup API, which enables you to determine the geolocation of an image by passing it through the API endpoint. The Geolocate Lookup API uses AI to detect an image’s location and its corresponding coordinates. We’ll use this feature in this tutorial.
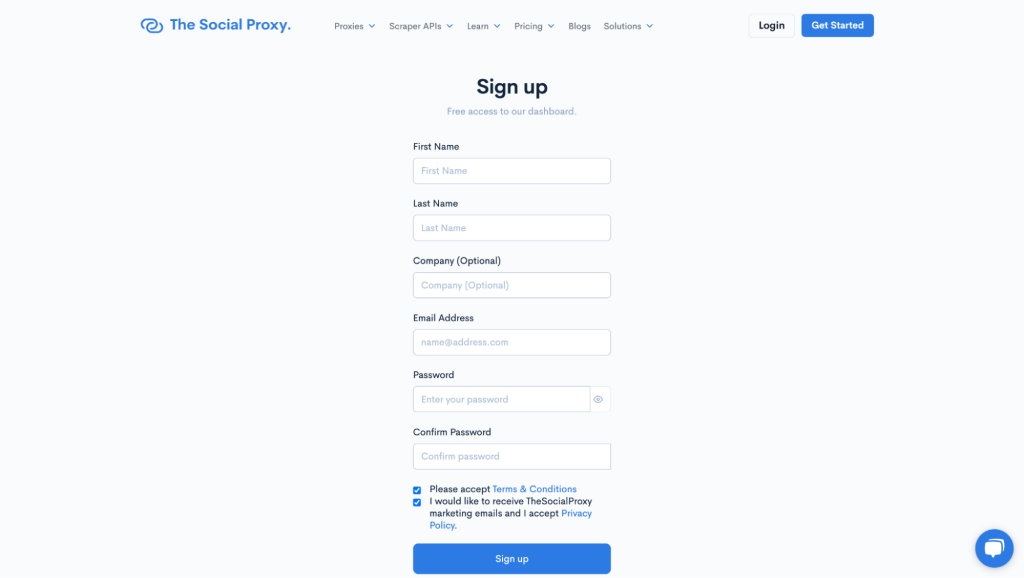
For this project, we will need access to the Scraper AI API endpoints for Instagram and the Geolocate Lookup API. To access these, you will need to set up an account with “The Social Proxy.” This will provide you with a username, password, consumer keys, and consumer secrets, which are required to access the Scraper AI API. Skip this section if you already have an account.
Follow these steps to get started:
Click on the account verification link sent to your email from The Social Proxy.
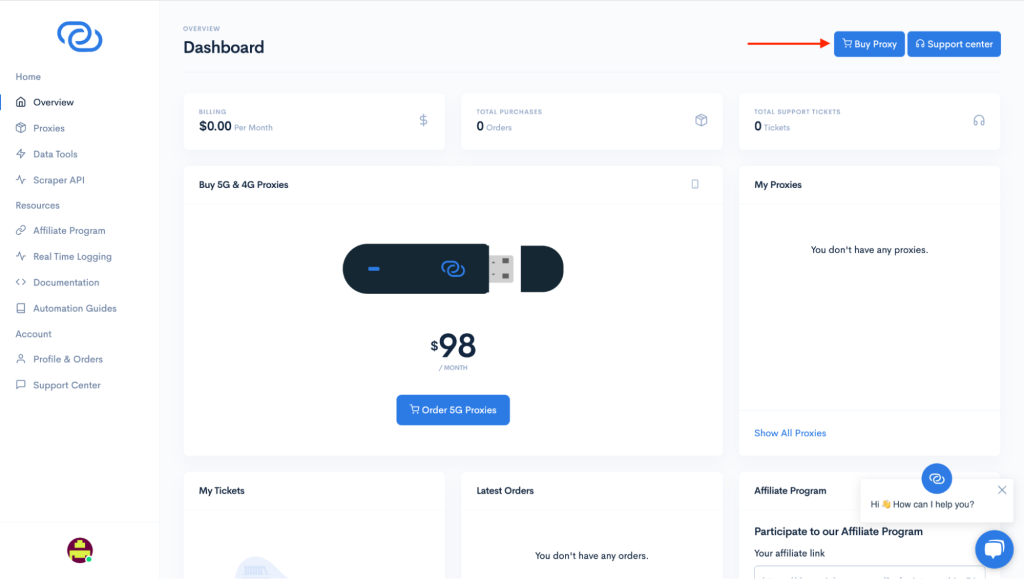
Access your dashboard on The Social Proxy and click on “Buy Proxy” to select a plan.
Choose a plan: In the buy proxies page, select “Scraper API,” choose your subscription type, and click “Checkout.”
Now we’ll build an Instagram profile location tracker using Python and its libraries and versions of API endpoints. It’s important to follow this guide step by step, without skipping any details. So, roll up your sleeves and let’s get started!
Download and install Python for your operating system, run the installer, and ensure you follow all instructions that appear on your screen.
Download and install visual studio code, run the installer, and follow all instructions. Now go ahead and set up your vscode for python using this guide.
Set up a virtual environment where you can download all the necessary libraries. It ensures that the libraries required for a specific project won’t interfere with those in your global environment.
Open a terminal, create a folder for your project, and run the following command:
In this section, we’ll use the Scraper API to scrape text and images from a specific Instagram profile.
Navigate to your project folder and run the command pipenv shell in your terminal to activate your virtual environment.
Note: Your virtual environment must be active while building this project. Ensure all installations are made within the virtual environment. All scripts should be executed from the terminal or command-line interface (CLI).
You’ll need to install two libraries:
Install these libraries by running the following commands in your terminal/command line interface (CLI):
Set up environment variables:
Open VSCode and navigate to your project folder. Create a .env file and enter your CONSUMER_SECRET and CONSUMER_KEY.
CONSUMER_KEY = ""
CONSUMER_SECRET = ""
Create a config.py file in the project folder and enter this code:
"""This module extracts information from your `.env` file so that
you can use your Social Scrapy Keys in other parts of the application.
"""
# The os library allows you to communicate with a computer's
# operating system: https://docs.python.org/3/library/os.html
import os
# pydantic used for data validation: https://pydantic-docs.helpmanual.io/
from pydantic_settings import BaseSettings
def return_full_path(filename: str = ".env") -> str:
"""Uses os to return the correct path of the `.env` file."""
absolute_path = os.path.abspath(__file__)
directory_name = os.path.dirname(absolute_path)
full_path = os.path.join(directory_name, filename)
return full_path
class Settings(BaseSettings):
"""Uses pydantic to define settings for project."""
CONSUMER_KEY: str
CONSUMER_SECRET: str
class Config:
env_file = return_full_path(".env")
# Create instance of `Settings` class that will be imported
# in lesson notebooks and the other modules for application.
settings = Settings()
#import the necessary libraries
import requests
import json
from config import settings
#choose an instagram handle you will like to scrape
username = 'oivindhaug'
#Importing the environment variables from the .env file using the #settings class in config
CONSUMER_KEY=settings.CONSUMER_KEY
CONSUMER_SECRET = settings.CONSUMER_SECRET
def scrape_instagram(consumer_key, consumer_secret, username, limit):
CONSUMER_KEY=consumer_key
CONSUMER_SECRET = consumer_secret
username = username
url = f'https://thesocialproxy.com/wp-json/tsp/instagram/v1/profiles/feed?consumer_key={CONSUMER_KEY}&consumer_secret={CONSUMER_SECRET}&username={username}'
payload = {}
headers = {
'Content-Type': 'application/json',
}
# Initialize an empty list to store all results
all_results = []
# Pagination handling (if applicable)
next_page = 1 # Start with the first page
limit= limit # Limit to the number of pages to fetch, adjust as needed
while next_page and next_page <= limit:
# Make the request with current page
response = requests.get(url, headers=headers, data=payload)
# Parse JSON response
response_json = response.json()
# Check if results are in the 'data' key
if 'data' in response_json and isinstance(response_json['data'], list):
results = response_json['data']
all_results.extend(results) # Add the current page results to the total list
# Check if there's a next page
next_page += 1 # Increment to the next page
else:
# No more data or unexpected structure
break
return all_results
# Scrape the data from the instagram profile and store in the variable data
data = scrape_instagram(CONSUMER_KEY,CONSUMER_SECRET,username,10)
Run python scraper.py in your terminal and wait for the output. If you followed all the steps correctly, you should see an output similar to the one shown below. The value of the limit variable will determine how much data is returned with each API call.
The scrape_instagram function will scrape data from the instagram pages in the username. The limit argument determines the number of pages to scrape data from. This function will scrape ten pages from the Instagram account. The pages contain 12 unique posts.
The data scraped contains information such as the time the post was made (taken_at), the location of the user when the post was made, the latitude and longitude of the location, the caption text, the media url, and lots more. You will learn how to extract the necessary information in the next step
Note: Each API call reduces your API credit. Open a Jupyter notebook within your project directory, and run the code snippets within code blocks in the notebook. A Jupyter notebook commits every session in memory, therefore, you won’t need to call the API again after scraping the data. Here is a guide on how to set up jupyter notebooks in vscode and a guide on how to use your virtual environment as a kernel in Jupyter Notebook.
Follow the guides below if you’re working within a Jupyter notebook. If you’re not working within a Jupyter notebook, skip to the next step.
from datetime import datetime
# Convert Unix timestamp to readable time
def convert_timestamp(unix_timestamp):
return datetime.utcfromtimestamp(unix_timestamp).strftime('%Y-%m-%dT%H:%M:%S'
def extract_location(all_results, limit):
extracted_posts = [] # List to store all extracted data
for i in range(limit):
postx = all_results[i]['items']
for post in postx:
taken_at = post['taken_at']
# Convert taken_at from Unix to readable time format
time = convert_timestamp(taken_at) if isinstance(taken_at, int) else 'Unknown Time'
# Default values for caption-related fields
caption_text = 'No caption'
# Check if 'caption' exists
caption = post.get('caption')
if caption:
caption_text = caption.get('text', 'No caption') # Extracting the caption text
# Default location values
location_name = 'Unknown Location'
latitude = 'Unknown Latitude'
longitude = 'Unknown Longitude'
# Extract location if available
location = post.get('location') # Use get() to avoid KeyError if 'location' doesn't exist
if location:
location_name = location.get('name', 'Unknown Location')
latitude = location.get('lat', 'Unknown Latitude')
longitude = location.get('lng', 'Unknown Longitude')
# Default value for image URL
image_url = 'No Image URL'
# Extract image URL if the post is an image
image_versions = post.get("image_versions2", {}).get("candidates", [])
if image_versions:
image_url = image_versions[0].get("url", "No Image URL")
# Append the extracted data
extracted_posts.append({
'taken_at': time,
'caption_text': caption_text,
'location_name': location_name,
'latitude': latitude,
'longitude': longitude,
'image_url': image_url # Include the image URL
})
return extracted_posts
# Extract the locations
posts = extract_location(data,len(data))
This code snippet will extract time of post, caption text, location of the post, latitude and longitude of the location. These will be stored in the posts variable.
In the last section, we discovered that some posts were made without explicit locations. However, many captions contain locations mentioned in the text itself. In this section, we’ll go over how to analyze caption text and extract locations using SpaCy. SpaCy is an open-source Python library for natural language processing (NLP) tasks.
def get_location_from_text(posts):
#load SpaCy model
nlp = spacy.load("en_core_web_sm")
doc = nlp(posts)
# Extract any location entities (GPE)
location = [ent.text for ent in doc.ents if ent.label_ == "GPE"]
# initialize the nominatin from geopy for getting the coordinates
geolocator = Nominatim(user_agent="my_app")
location_coordinate = geolocator.geocode(location)
if location_coordinate:
return location_coordinate.latitude, location_coordinate.longitude
return "Unknown Latitude", "Unknown Longitude"
The get_location_from_text function extracts locations from all caption texts and adds them to a list of locations. It also retrieves the respective coordinate of each location using the Geopy Python library. Note that some posts without explicit locations might not also mention locations in their captions. In the next step, we’ll learn how to use the AI Geo Lookup API to extract locations from such posts.
The AI Geo Lookup endpoint in Scraper AI utilizes artificial intelligence to detect the location of an image. In this section, you will learn how to use this API endpoint to determine the location of a post based on the image it contains.
Here is the endpoint:
import requests
import json
url = "https://thesocialproxy.com/wp-json/tsp/geolocate/v1/image?consumer_key={CONSUMER_KEY}&consumer_secret={CONSUMER_SECRET}"
payload = json.dumps({
"image": "{BASE64_IMAGE}"
})
headers = {
'Content-Type': 'application/json',
}
response = requests.request("POST", url, headers=headers, data=payload)
print(response.text)
This endpoint accepts images in BASE64 format, so we’ll continue by doing the following:
Enter the code snippet below other functions in the scraper.py file. This function calls in the AI Geo Lookup API.
# Geolocation API call
def get_geolocation_from_image(base64_image, CONSUMER_KEY, CONSUMER_SECRET):
try:
url = f"https://thesocialproxy.com/wp-json/tsp/geolocate/v1/image?consumer_key={CONSUMER_KEY}&consumer_secret={CONSUMER_SECRET}"
payload = json.dumps({
"image": base64_image
})
headers = {
'Content-Type': 'application/json',
}
response = requests.request("POST", url, headers=headers, data=payload)
#response.raise_for_status()
data = response.json()
geo_predictions = data['data']['geo_predictions']
coordinates_list = [prediction['coordinates'] for prediction in geo_predictions]
if coordinates_list:
return coordinates_list[0]
else:
return ('Unknown Latitude', 'Unknown Longitude')
except Exception as e:
print(f"Error during geolocation API call: {e}")
return ('Unknown Latitude', 'Unknown Longitude')
Add the code snippet below the previous function. This code snippet uses requests to download the image from the image URL, convert the image to BASE64 format, and pass the BASE64-encoded image through the AI Geo Lookup API endpoint to retrieve the location.
# Function to fetch image-based geolocation if location from caption fails
def fetch_geolocation_from_image(image_url, CONSUMER_KEY, CONSUMER_SECRET):
try:
# Step 1: Download the image
response = requests.get(image_url)
#response.raise_for_status() # Check for HTTP errors
# Step 2: Convert the image to Base64
image_data = response.content # Get the image data in bytes
base64_image = base64.b64encode(image_data).decode('utf-8') # Encode to Base64 and decode to string
except requests.exceptions.RequestException as e:
print(f"Error fetching the image: {e}")
return None
if base64_image:
return get_geolocation_from_image(base64_image, CONSUMER_KEY, CONSUMER_SECRET)
Note: You must import base64. Add that to the very top of the scraper.py file.
Add the following code snippet below the other functions in the scraper.py file. This code snippet will extract the latitude, longitude, and time for each post. The posts argument required by this function is the object returned after running the extract_location function.
def extract_location_data(posts, CONSUMER_KEY, CONSUMER_SECRET):
location_data = []
for post in posts:
location = post['location_name']
caption = post['caption_text']
image_url = post['image_url']
latitude = post['latitude']
longitude = post['longitude']
time = post['taken_at']
if location == "Unknown Location":
latitude, longitude = get_location_from_text(caption) # Assuming this function exists elsewhere
if latitude == "Unknown Latitude" and longitude == "Unknown Longitude":
latitude, longitude = fetch_geolocation_from_image(image_url, CONSUMER_KEY, CONSUMER_SECRET) # Assuming this function is defined
# Append only latitude, longitude, and time to the list
location_data.append([latitude, longitude, time])
return location_data
In this section, we will use the Folium Python library to create an interactive map, as shown earlier in this tutorial. Folium is a Python wrapper around the Leaflet.js library, which is designed for making interactive maps.
To get started:
# Sample data: [latitude, longitude, timestamp]
def create_maps(locations, filename="map_file_john_obidi.html"):
# create a dataframe from the locations input
location_df = pd.DataFrame(locations, columns=['latitude', 'longitude', 'timestamp']).sort_values('timestamp')
locations = location_df.to_dict(orient='records')
locations
# Create a map centered around the first location
m = folium.Map(location=[locations[0]['latitude'],locations[0]['longitude']], zoom_start=13)
# Add markers and a path to the map
coordinates = [(loc['latitude'],loc['longitude']) for loc in locations]
AntPath(locations=coordinates, dash_array=[20, 20], pulse_color='blue').add_to(m)
# earliest date and latest date
start_time = locations[0]['timestamp']
end_time = locations[-1]['timestamp']
for idx, loc in enumerate(locations, start=1):
date = datetime.fromisoformat(start_time).date()
time = datetime.fromisoformat(start_time).time()
if idx == 1:
text = f"Start\nDate: {date}\nTime: {time}"
text = folium.Popup(text, show=True)
icon = folium.Icon(color='red')
elif idx == len(locations):
date = datetime.fromisoformat(end_time).date()
time = datetime.fromisoformat(end_time).time()
text = f"End\nDate: {date}\nTime: {time}"
text = folium.Popup(text, show=True)
icon = folium.Icon(color='red')
else:
date = datetime.fromisoformat(loc['timestamp']).date()
time = datetime.fromisoformat(loc['timestamp']).time()
text = f"Date: {date}\nTime: {time}"
text = folium.Popup(text)
icon = folium.Icon(color='blue')
folium.Marker(
location=[loc['latitude'], loc['longitude']],
popup=text,
icon=icon
).add_to(m)
# Save the map to an HTML file
m.save(filename)
Create a plot_map.py file in your project folder and add the code below.
from scraper import (
scrape_instagram, extract_location, convert_timestamp,
extract_location_data, fetch_geolocation_from_image,
get_location_from_text, get_geolocation_from_image,
create_maps
)
from config import settings
def main():
# Define your parameters
username = 'johnobidi'
CONSUMER_KEY = settings.CONSUMER_KEY
CONSUMER_SECRET = settings.CONSUMER_SECRET
limit = 10
# Scrape the data from the Instagram profile and store in the variable data
data = scrape_instagram(CONSUMER_KEY, CONSUMER_SECRET, username, limit)
# Get the necessary information using the extract_location function
posts = extract_location(data, len(data))
# Extract location data
location_data = extract_location_data(posts, CONSUMER_KEY, CONSUMER_SECRET)
# Create maps from location data
create_maps(location_data)
if __name__ == "__main__":
main()
In this tutorial, we built an Instagram profile location tracker using the Scraper AI API and several open-source libraries, including Folium and SpaCy. We started by scraping the data with Scraper AI, then extracted location names and coordinates from captions using SpaCy and Geopy. Next, we identified location names from images using the AI Geo Lookup API and created an interactive map with Folium.
Although we developed an Instagram Profile Tracker, you can explore other location trackers with Facebook, LinkedIn, or others. You can also build your new product on its API endpoints for football, streetview and reddit data. If you know languages other than Python, you can apply similar techniques in those languages as well.